Cleaning Methods
Ultrasonic Cleaning Explained
The questions to ask before adding another cleaning stage.
The approach
Have you ever seen a closeup shot of a record groove? It’s tiny. Extremely tiny. As is your turntable’s stylus, which rides the groove.
Now what about a record brush? It doesn’t matter which one. Pick your favorite. The bristles on it are much larger than the width of the groove. They are great for brushing off dust and lint, but not so great when it comes to getting deep into the groove itself. That’s where residue, oils, and compacted sediment can hide.
So how do you get to it?
Cavitation.
In a nutshell, cavitation is created by running high-frequency sound waves through a liquid bath. It forms extremely small bubbles which, when they collapse, fire out jets of liquid at high speed. Take a record, place it into a reservoir with those microscopic, exploding bubbles, and you are essentially scrubbing the groove clean.
The higher the frequency, the smaller the bubbles. Lower frequencies produce larger and more energetic bubbles.
To ensure that the cleaning liquid spreads evenly over the surface and into the groove, you need something that will break the surface tension. To do that you want to add a surfactant. You don’t need much, just a small amount. The water will relax and flow where you need it to flow.
Many companies who make ultrasonic machines provide and sell their own surfactant that has been tested with their machine. If you decide to make your own just be aware of this and whatever warranty the manufacturer offers and what could affect it.
Another thing to know when it comes to surfactants. Some foam easily. Use sparingly. Too much foam is the enemy of effective cavitation. You’re basically making a very expensive bubble bath.
What you need
It is worth noting there are different machines at different price points. They are not all created equal.
At the low end are the tanks sold by companies like Vevor. They are inexpensive and hold about 6 liters of liquid. An example is the industrial-style Vevor. It runs at 40 kHz and allows you to clean a few records at the same time using a powered rotisserie-style motor that sits on the edge of the tank.
Next, and for more money, are the HumminGuru products. They also run at 40 kHz and include a draining and drying cycle. The amount of liquid they hold is small in comparison to the Vevor, but the record sits close to the reservoir’s walls as it rotates (one at a time) which makes for a shorter path from transducer to the record’s surface. This theoretically allows for less wattage, and the HumminGuru runs its transducers at 45 watts.
I bring up wattage for a reason. Don’t confuse it with the frequency. The watts power the transducer behind the frequency and it can be deceiving. In comparison to the HumminGuru’s 45 watts, the Vevor runs at 180 watts total. That 180 watts of power is being distributed into 6 liters of water. HumminGuru’s 45 watts operates in a much smaller basin with transducers closer to the record. More wattage does not equal better cleaning. It can, but it all depends on the design.
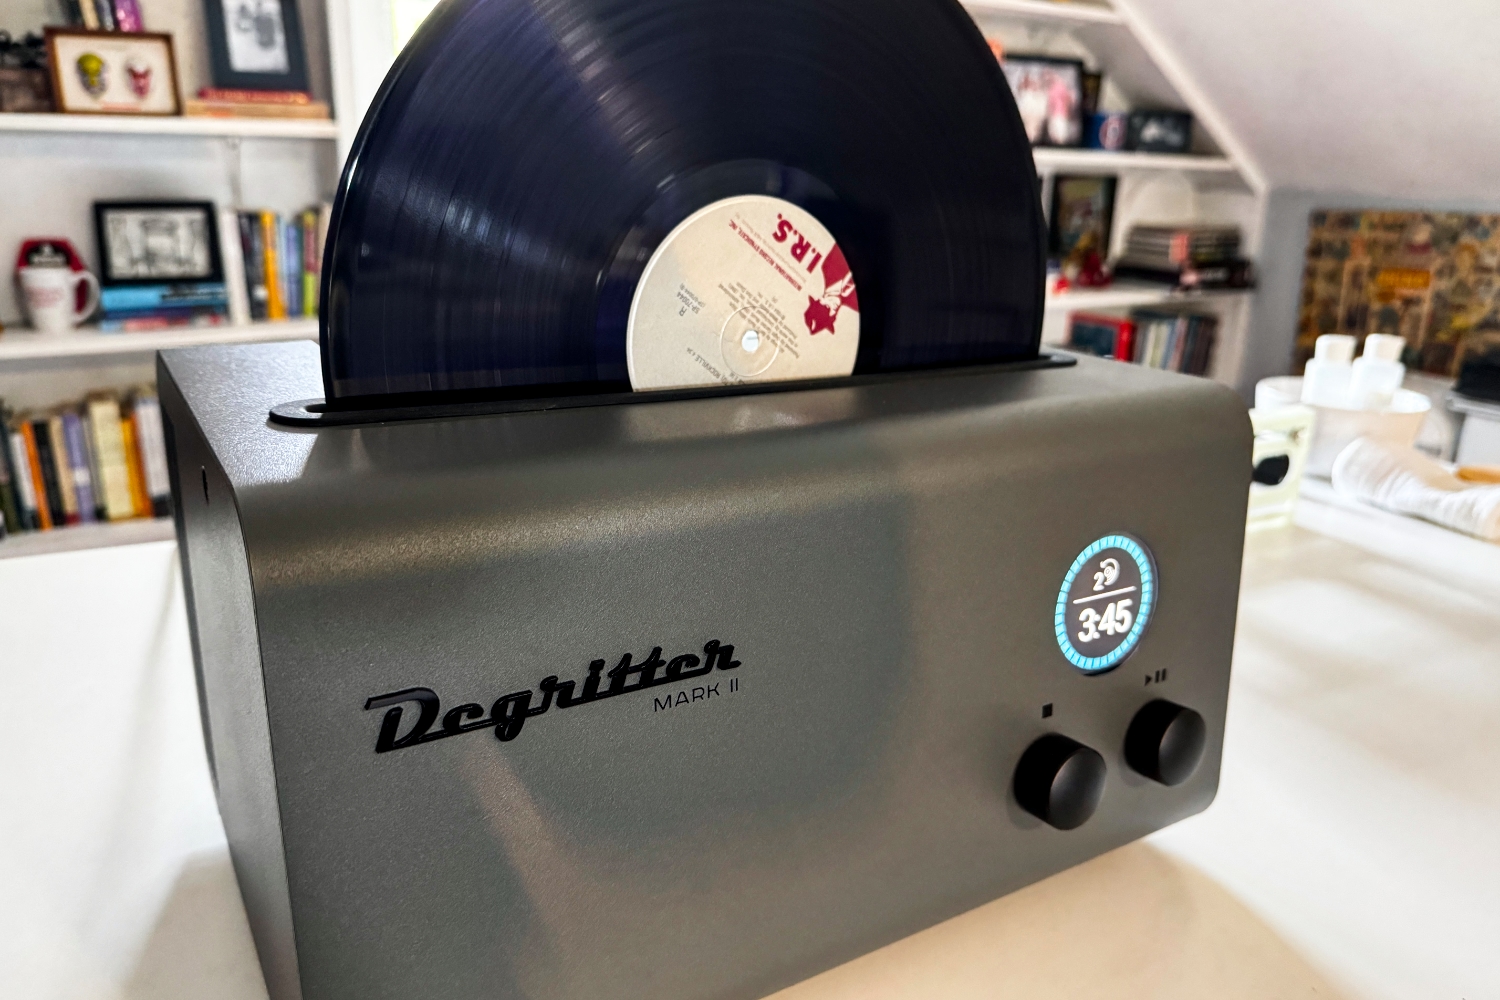
On the higher end are machines made by Kirmuss, Klaudio, and Degritter. The two “K” brands run frequencies of 35 kHz and 40 kHz respectively, while the Degritter offers 120 kHz. These come with drying cycles, temperature controls, and filtration. All are respectable and all are high-end, well-built machines.
What else do you need? Distilled water and a very small amount of surfactant (as mentioned above). Do not use tap water or filtered water as you have no idea what it contains and you will most likely leave a small film behind that you won’t even know is there.
As for surfactant, see what the manufacturer recommends. If you decide to take matters into your own hands and make your own, I have a page about that here.
The steps
-
Look at the record. I have a process I go through with every record. It’s a bit overkill, and I acknowledge that. I’m obsessive about making sure there are no hidden surprises in the groove. You don’t have to do what I do. If the record looks clean, it can go straight into the ultrasonic machine. If it looks like it has a hazy film on it, or has visible fingerprints, give it a manual degrease. I outline how I do that in the first couple of steps of my routine.
-
Dry brush any loose materials. These are the strands of hair or lint that can easily come off. This will keep it out of the ultrasonic bath and allow you to reuse the solution a few times.
-
Fill the reservoir with your distilled water/surfactant mix.
-
Degas the liquid. If it’s a fresh batch of liquid there will be dissolved air in it. This will lessen the effectiveness of cavitation. Run the machine for five or ten minutes to get rid of the gasses. Machines like the Degritter have a degas cycle. It’s a nice to have, but simply running the machine first without a record in it for a few minutes is enough. You don’t have to do this again until you replace the solution with a fresh batch.
-
Keep an eye on the temperature. Cavitation creates heat. The water will warm up. That’s okay as long as the bath remains under 35 degrees Celsius (or 95 degrees Fahrenheit). Heated water may reach a temperature that can soften the vinyl and lead to warpage. Some machines, like the Vevor, have a heater built in. My recommendation is to leave heaters off. Machines like the Degritter will warn you when you are close to the limit and will even kick in with a cooling cycle to bring the temperature back down.
-
Don’t crowd the machine. This applies to those multi-record rotisserie-style ultrasonic tanks (like the Vevor again). Placing too many records in rotation means some records, especially those on the inside, will be blocked from full cavitation. Leave an inch or so between records. The documentation may say it can hold six or eight records, but keep it to no more than three with room in between.
-
Rinse. Surfactant left on the record will dry on the record and leave a film. You won’t know it’s there but it is. That film, depending on the chemistry, can potentially dull the sound, raise the noise floor (which defeats the purpose), or contaminate your stylus. If the machine allows for a distilled water rinse cycle, that’s great. If not, empty the tank, fill it with distilled water, and run a rinse cycle. This is one of those steps that can’t be skipped if you use a surfactant.
-
Dry immediately. Some machines have a forced air (fan) drying cycle. I prefer to use a vacuum machine like the Record Doctor to suck off the liquid and any contamination. Forced air is fine. Even a clean microfibre cloth is okay if you don’t want to spend money on an extra machine. What I would stay away from is air drying and allowing dust to find its way to the record.
-
Put the cleaned record directly into a fresh sleeve. It will thank you for it.
-
Change the solution. Look at what the manufacturer recommends. If it isn’t documented, use your judgement. I change the solution after fifteen records if they aren’t filthy. If you’re cleaning a lot of visibly dirty used records, change the solution every eight to ten records. If they are extremely contaminated, do so after five or six records.
How long should you clean? It’s a great question. As always, check on what the manufacturer recommends.
Who this is for
If you buy a lot of used records and have a fairly large collection, hand cleaning is probably a chore in itself, and isn’t very effective. A serious collector will notice the noise floor. That’s where machines come in. A record that looks clean but plays noisy is a perfect candidate for ultrasonic cleaning. That noise may be due to years of residue packed into the groove. A brush won’t do anything. Over the decades there have been many attempts to create the perfect cleaning formula and many were sub-par or gave very little thought to how it might dry on the record. Ultrasonic cleaning excels at removing it.
If you mainly buy new and sealed records, you probably do not need to jump into ultrasonic cleaning. Personally, I clean new records as well. I’ve seen fingerprints and debris on new records and I’d rather start with a surface I’ve cleaned myself.
Worth mentioning
No amount of cleaning, even the most expensive machine out there, will help if the problem is groove wear. Ultrasonics and other machines remove contamination. A record from the 1970s that encountered excessive tracking force or was played to death with a ceramic stylus is damaged in a way that is irreversible.
How do you know the difference? Unfortunately, sometimes you don’t until you’ve played it, cleaned it, and listened to it again. If a noisy passage persists, it may not be dirt; you may be hearing the history of the record.